

A germination rack is a shelving frame that holds seed trays, humidity domes, and sometimes lights or heat mats in a controlled vertical layout. It improves uniformity by keeping trays at consistent spacing, airflow, moisture, and temperature, but it does not replace correct seed, media, and watering practice.
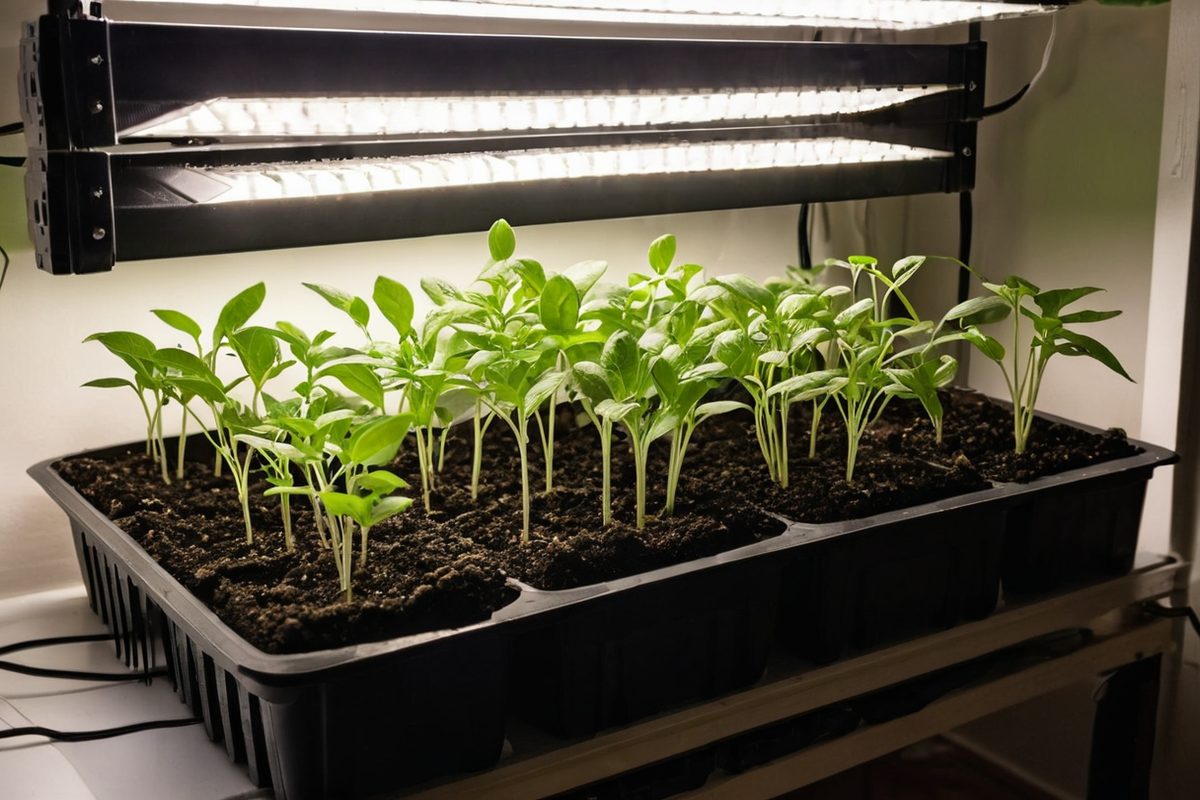
What a germination rack does—and does not do
At its simplest, a germination rack multiplies the number of trays per square metre of floor. A four-tier rack with four 10×20-inch trays per shelf holds 16 trays in roughly the footprint of a single bench. That density is useful for home seed starters and small nurseries, but density also creates microclimates: the top shelf usually runs warmer and drier, the bottom shelf cooler and more humid, and the middle shelves are often the most even.
The rack itself does not cause germination. Seed viability, moisture, oxygen, temperature, and—for some species—light are the drivers. What a well-chosen rack does is reduce variation between trays. A poor rack, or a good rack loaded badly, can do the opposite: trap humidity, block airflow, and make damping-off more likely.
How a germination rack actually works
Think of the rack as a set of stacked environments. Each shelf holds a tray or a group of trays; the gap above the tray determines whether a dome fits and how much light reaches the seedlings; the gap below affects drainage and air movement. Heat rises, so in a still room the top of a germination rack can be 1–3°C warmer than the bottom. Moisture also stratifies: trays on lower shelves receive drip from above unless you use drip shields or separate watering zones.
Airflow is the part buyers underestimate. A gentle fan moving air across the shelves helps keep temperature and humidity even and reduces leaf wetness after misting. Direct, strong airflow can dry media edges and tip small seedlings, so low-speed circulation is usually enough. For home setups, the home gardening propagation guide covers tray, dome, and light basics that apply directly to a rack.
Light is optional for germination itself, but not for seedlings. Many seeds germinate in darkness, while some species need light exposure; once cotyledons open, seedlings need light quickly to avoid stretching. Adjustable light bars 15–30 cm above the tray are easier to manage on a rack than fixed shelves, because you can raise the bars as plants grow.
What the numbers mean
The standard 10×20-inch propagation tray—often called a 1020 tray—measures about 10.5 × 20.5 inches, or roughly 1.5 square feet (0.14 m²) of tray area. That number drives everything else. A 48×24-inch shelf has 8 square feet of shelf area, so it can hold four 1020 trays with about 75% coverage; the remaining space is handling gap and airflow. A 48×18-inch shelf typically holds two trays in one row.
Wet weight matters as much as tray count. A 1020 tray filled with moist media and 128–288 cells typically weighs about 4.5–9 kg (10–20 lb), depending on media and saturation. Four trays per shelf can therefore add 18–36 kg. Wire shelving rated at 50–75 kg per shelf is usually adequate for home use; commercial racks often rate 80–120 kg per shelf. Check the rack’s total load, not just the per-shelf figure.
Temperature and humidity numbers are crop-specific, but some practical ranges are useful for reference. Many warm-season vegetable seeds germinate well at 20–28°C soil temperature, while cool-season types often prefer 15–20°C. Humidity domes typically hold relative humidity around 90–95% until emergence, then should be removed or vented. For seedlings, a common light range is roughly 100–200 µmol/m²/s PPFD at canopy for 12–16 hours per day, depending on species. Coated or treated seed can change moisture uptake and handling, so check seed coating formulations before assuming the same watering schedule.
| Rack type | Typical shelf spacing | 1020 trays per shelf | Typical shelf load | Typical use | Cost reference |
|---|---|---|---|---|---|
| Basic wire or plastic shelf rack | 30–45 cm (12–18 in) | 2 on a 48×18-inch shelf | 40–60 kg | Home seed starting, domed trays | US$40–120 |
| Adjustable steel utility rack | 30–50 cm (12–20 in) | 4 on a 48×24-inch shelf | 50–75 kg | Small nursery, mixed crop stages | US$80–200 |
| Rolling nursery rack | 25–40 cm (10–16 in) | 2–4, depending on shelf size | 80–120 kg | Commercial propagation, easy movement | US$150–400 |
| Lit propagation rack | 30–45 cm (12–18 in) | 2–4, depending on shelf size | 30–50 kg | Seedlings needing supplemental light | US$150–500 |
Cost references are rough retail or ex-works estimates for reference; trays, lights, heat mats, and freight are extra.
How to choose or apply a germination rack
When choosing a germination rack, start with the peak tray count and work backward to shelf size, clearance, and load. A rack that is slightly larger than your average batch is usually more useful than one that is packed during the busiest week.
- Count peak trays, not average trays. If your busiest week is 24 trays, size for 24 plus 10–20% spare. A four-tier rack with four trays per shelf gives 16 positions; two racks give 32.
- Check tray footprint against shelf depth. A 1020 tray needs at least 28 cm (11 in) of clear depth. A 24-inch-deep shelf allows two rows; an 18-inch shelf usually allows one. Confirm inner dimensions, not outer frame dimensions.
- Set clearance by crop stage. Allow 25–30 cm (10–12 in) above the tray for domes, and 35–45 cm (14–18 in) for growing seedlings. Adjustable shelves are more flexible than fixed shelves.
- Plan airflow before loading. Leave 5–10 cm between trays and shelf edges, use a low-speed fan, and avoid packing shelves tight against a wall.
- Separate temperature zones. Put heat-loving crops on upper shelves or use thermostatted heat mats; keep cool-season types lower or on a separate rack.
- Control water and drip. Use trays or drip shields, bottom-water or mist lightly, and keep electrical fittings away from splash. The irrigation and soil moisture guide has relevant watering checks.
- Verify load and stability. Add wet tray weight, check total capacity, use casters only on level floors, and anchor tall racks where needed.
- Clean between batches. Remove media and algae from shelves, disinfect trays and shelf surfaces, and dry before reuse.
Common mistakes
- Buying fixed shelf spacing that is too tight for domes or fast-growing seedlings.
- Overloading the top shelf and making the rack top-heavy.
- Running no airflow, which keeps humidity high around leaves and increases disease risk.
- Stacking wet trays without drip protection, so lower trays stay saturated.
- Mixing species with different temperature or light needs on the same shelf.
- Using heat mats without a thermostat, especially on upper shelves that are already warmer.
- Ignoring aisle, door, and ceiling clearance when the rack is delivered.
- Assuming tray count equals plant count; cell count and tray size determine actual plant numbers.
FAQ
Do I need a lighted germination rack?
Not for germination of many species, but seedlings need light as soon as they emerge. A lighted rack with adjustable bars is more flexible; with a plain rack, add separate lights 15–30 cm above trays and raise them as plants grow.
How many 1020 trays fit on a four-tier rack?
It depends on shelf size. A 48×24-inch shelf typically holds four 1020 trays, so a four-tier rack gives 16 positions; a 48×18-inch shelf usually holds two, giving eight positions. Check inner shelf dimensions and allow airflow gaps.
What shelf spacing should I order?
For domed trays, 25–30 cm (10–12 in) is a common minimum; for seedlings, 35–45 cm (14–18 in) is more comfortable. Adjustable shelves are usually worth the extra cost because crop height changes quickly.
Practical note: If you are specifying a germination rack for a nursery or import order, send tray dimensions, trays per shelf, shelf count, load per shelf, and whether lights or heat mats are included. Those details determine frame gauge, shelf spacing, and packaging.